BASH & GUIDE INSTALL INSTRUCTIONS
Things You Will Need
- 4mm Hex tool
- 5mm Hex tool

COMPLETE EXPLODED VIEW & PARTS LIST

Assembly time, approximately 10-15 minutes. Difficulty: Easy
NOTE: These instructions are applicable for all V2 One Up guides and bashes. The exploded view represents our BashGuide option. For all other options the back plate is the most notable change when referencing the exploded view. Bashplates and Top guides are interchangible between our entire guide & bash line up.
Bash Guide: All steps applicable.
ISCG-05 UnderBash: Steps 1-6.
ISCG-05: steps 7-15.
E-Bike - Steps/EP8: Steps 7-15.
BASH SELECTION & INSTALL INSTRUCTIONS
STEP 1: BASH SELECTION
There are three bash plate options: 28T-30T, 32-42T, 36T. Choose the bashplate (1) that matches your current ring size. The Bash guide & the Under Bash come with the 32T-34T bashplate installed.
NOTE: If the 32T-34T bashplate is the right one for your set up, you can skip forward to step 7.

STEP 2: REMOVING BOLT KEEPER
Remove bolt keeper (10) from rear bash plate bolt by pushing a 4mm hex through the bolt from the backside of the guide.

STEP 3: REMOVING BASH MOUNTING BOLTS
Remove bash mounting bolts (2) using a 5mm hex.

STEP 4: BASH PLATE SELECTION
Select desired bash plate (1) and place bash mounting bolts (2) into holes of bash plate.

STEP 5: INSTALL BASH MOUNTING BOLTS
Tighten bash mounting bolts (2) to 6Nm using your 5mm Hex key.
STEP 6: INSTALL BOLT KEEPER
Reinstall bolt keeper (10) on the rear bash mounting bolt (2).

GUIDE SETUP INSTRUCTIONS
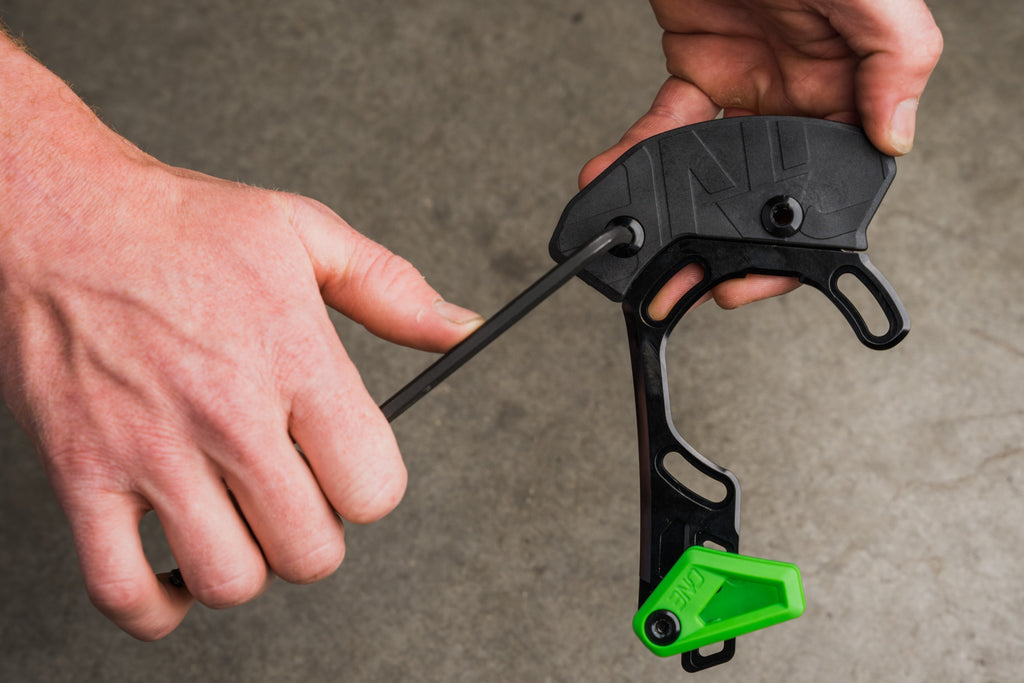
STEP 7: REMOVE TOP GUIDE
Remove top guide (5,6) by removing the front guide locknut (11) with a 4mm hex (never adjust the rear T25 bolt).

STEP 8: ADJUST SLIDER
Loosen slider bolt (3) counter-clockwise on the bottom left of the sliding backplate (9) with a 4mm Hex key. Set sliding backplate in the highest position & lightly tighten bolt; It will be readjusted later.

STEP 9: INSTALL BACKPLATE
Hold backplate (8) directly against ISCG05 tabs. Check for clearance between the back side of the bashplate/guide and the bike frame. Use included 2.5mm washers (4) if necessary to space the backplate away from the frame.


STEP 10: ADJUST BACKPLATE
Rotate backplate (8) until slider adjustment bolt is directly above the crank axle and torque bolts to 5Nm using a 4mm Hex key.
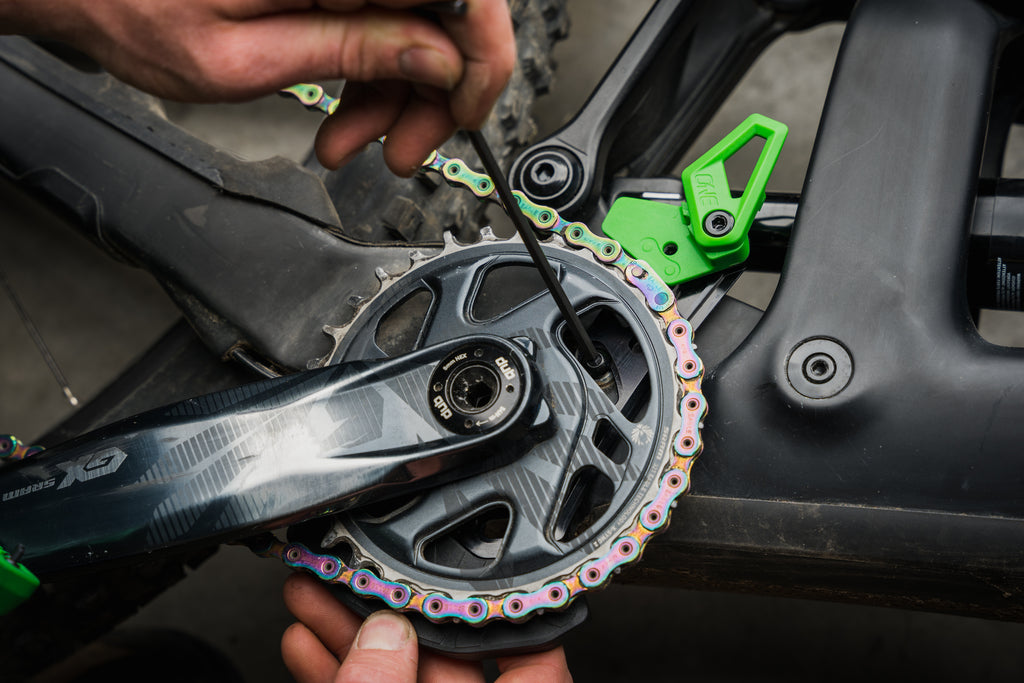
STEP 11: MEASURING SPACING
Use spacer shim block to measure clearance between backplate (8) and chain.

STEP 12: TOP GUIDE SHIMS
Determine the corresponding number of chainline shims required. Place shims onto top guide mounting bolt (7).
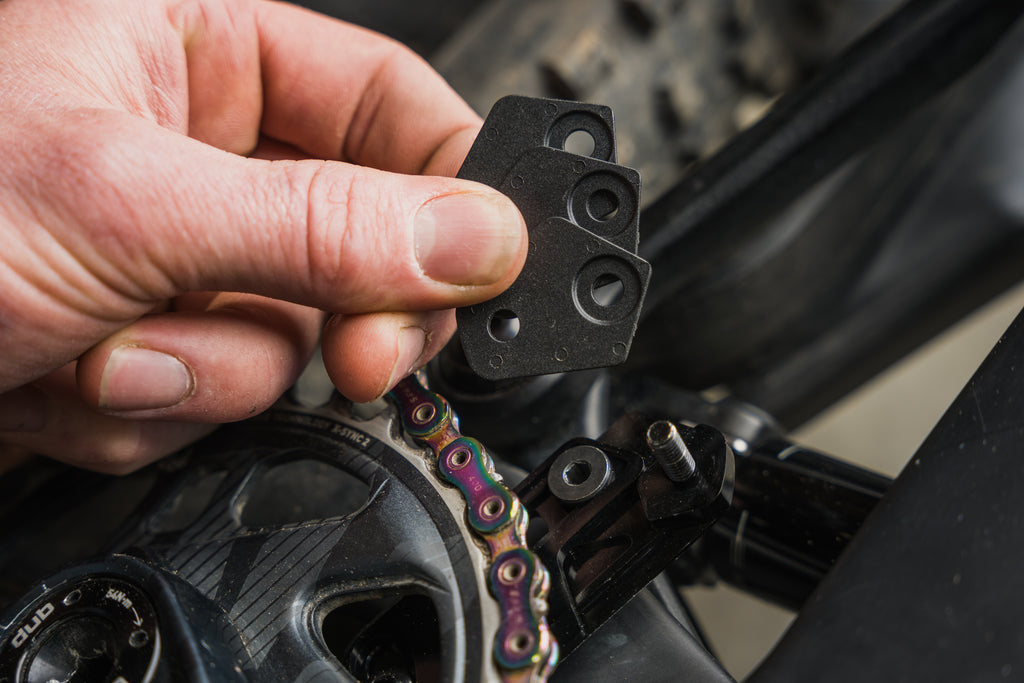

Note: If more than 5 shims are required, install the supplied 2.5mm washers behind the backplate and return to step 9.
STEP 13: INSTALL TOP GUIDE
Assemble top guide (5,6) with spacers behind it. Tighten the top guide with outer guide (6) in the flipped up position. Tighten guide locknut (11) to 3Nm using your 4mm Hex key.


STEP 14: ADJUST TOP GUIDE HEIGHT
Insert a 4mm hex through the hole in the inner top guide (5), loosen height adjustment bolt and lower the tool onto the chain, between the links. Torque to 3Nm to set height.

STEP 15: FLIP GUIDE
Flip outer guide (6) down into position using your hand.


Congratulations!
You have successfully installed your bashguide.
If you are still having trouble please email us at support@oneupcomponents.com for help. Please include a detailed description of your issue, photos are often helpful.
Thanks
OneUp